Sound Design for Audio Dramas: Complete Podcast Sound Guide
Want to know the secret ingredient that separates amateur audio dramas from professional productions? It’s sound design.
Think about your favorite detective podcasts or mystery audio dramas. What makes you feel like you’re actually standing in that rain-soaked alley or dusty office? It’s the ambient sounds, the footsteps echoing on wet pavement, the distant police sirens. Sound design for audio dramas transforms scripts into living, breathing worlds.
When I started creating Tommy Law: Private Eye, I had zero formal training in sound design. But I knew what good audio drama sounded like from listening to hundreds of old time radio detective shows like Philip Marlowe and Sam Spade. I just needed to figure out how to create those immersive soundscapes myself.
Here’s what I’ve learned: professional sound design for audio dramas doesn’t require a Hollywood budget or years of film school. With the right techniques, free resources, and consistent practice, you can create podcast sound design that rivals big-budget productions.
In this complete guide, I’ll walk you through everything you need to know about sound design for audio drama, from the basics of layering sounds to advanced mixing techniques. Whether you’re creating your first podcast or looking to level up your existing show, you’ll find actionable advice you can use immediately.
Let’s dive into the world of audio drama sound design.
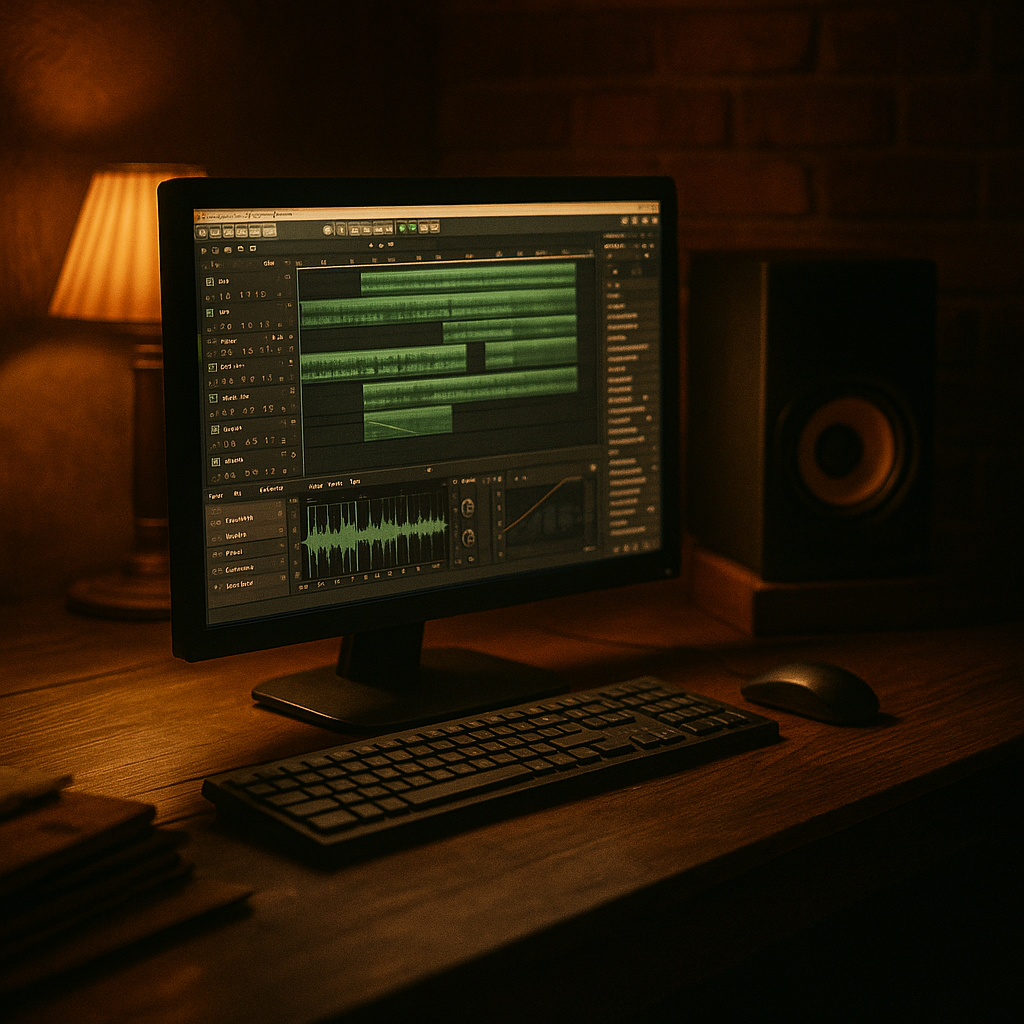
What Is Sound Design for Audio Drama?
Before we get into techniques, let’s define what we’re actually talking about.
Sound design is the art and craft of creating, selecting, and manipulating audio elements to tell a story. In film and TV, you have visuals to do most of the storytelling. In audio drama, sound is your only tool. You’re painting mental pictures using nothing but audio.
Effective audio drama sound design includes several key components:
- Dialogue – Your characters’ voices, recorded cleanly and mixed appropriately
- Sound effects (SFX) – Specific sounds like door slams, footsteps, gunshots, phone rings
- Foley – Custom-recorded sounds that sync with character actions (clothing rustles, paper shuffling, keys jingling)
- Ambience – Background soundscapes that establish location (city traffic, forest atmosphere, office hum)
- Music – Themes, scores, and atmospheric beds that enhance emotional impact
- Processing – Effects like reverb, EQ, and compression that place sounds in believable spaces
The magic of sound design happens when you layer these elements together seamlessly. Done right, listeners forget they’re listening to a podcast and feel transported into your story’s world.
Essential Sound Design Equipment (What You Really Need)
Let’s talk gear. Here’s the good news: you don’t need to spend thousands of dollars to create professional audio drama sound design.
I’ve seen creators obsess over equipment when their real problem is technique. Focus on learning the fundamentals first, then upgrade equipment as your skills (and budget) allow.
Microphones for Audio Drama
For dialogue recording, you need a decent microphone. I use two primary mics in my basement studio:
- Shure SM7B ($399) – The classic podcasting microphone. Warm sound, excellent noise rejection, forgiving in untreated spaces.
- Neumann TLM 102 ($700) – A condenser mic that captures more detail. Great for intimate dialogue but requires a quieter recording environment.
Starting on a budget? The Audio-Technica AT2020 ($99) delivers solid results. Even a decent iPhone can work for your first projects. Remember: compelling stories with basic sound design beat mediocre stories with expensive equipment every time.
Audio Interface
You’ll need an interface to connect your microphone to your computer. The Focusrite Scarlett 2i2 ($180) is reliable, affordable, and has everything you need for solo or small cast recording.
Digital Audio Workstation (DAW)
This is where the actual sound design work happens. Your DAW is where you’ll edit dialogue, layer sound effects, mix levels, and add processing.
I use PreSonus Studio One, but all major DAWs work great for audio drama sound design. Find one you’re comfortable with and master it. Popular options include:
- Audacity (FREE) – Perfect for beginners learning basic sound design
- Reaper ($60) – Incredibly powerful and affordable
- Adobe Audition ($20/month) – Industry standard with excellent sound design tools
- Logic Pro ($200, Mac only) – Great for both music and sound design
- Pro Tools (subscription) – Professional standard for audio post-production
Don’t agonize over which DAW to choose. Pick one that fits your budget and start learning. The principles of sound design apply across all platforms.
Headphones for Sound Design
Invest in quality headphones. You need closed-back headphones for recording (to prevent audio bleed into your mic) and flat-response headphones for mixing and sound design work.
I recommend the Audio-Technica ATH-M50x ($169) as an excellent all-around option. They’re accurate, comfortable for long sessions, and won’t break the bank.
Home Studio Setup on a Budget
I record most of my actors and my own dialogue in a small basement studio. I use shipping blankets and acoustic foam to deaden the room and reduce echo. You don’t need professional acoustic treatment to get clean recordings. Heavy blankets hung on walls, foam panels in corners, and even a closet full of clothes can dramatically improve your sound quality.
Quick studio tip: Record in the quietest room you have. Turn off fans, AC units, and refrigerators. Close windows. Put your phone on airplane mode. Clean recordings are easier to work with in post-production than trying to remove noise later.

Free Sound Effect Resources for Audio Drama
Here’s where many beginners get stuck: “Where do I find sound effects for my audio drama?”
The answer: there are thousands of free, high-quality sound effects available online. You just need to know where to look.
Freesound.org: Your Sound Design Library
Freesound.org is the holy grail of free sound effects. This massive collaborative database contains hundreds of thousands of Creative Commons-licensed sounds. You can find everything you need for audio drama sound design: footsteps, doors, gunshots, ambiences, vehicles, weather, and more.
Some sounds are completely free to use. Others require attribution (just credit the creator in your show notes). Either way, it’s an invaluable resource.
Pro sound design tip: Browse Freesound even when you’re not working on a specific project. Sometimes I’ll hear a sound that sparks an entire scene idea for my next episode.
YouTube Audio Library
Search YouTube for “royalty free [your sound effect]” and you’ll discover tons of options. Always check the licensing requirements. Some sounds need attribution; others are completely free to use in your audio drama.
Record Your Own Sound Effects
This is where sound design gets really fun. You can create custom foley using everyday objects:
- Footsteps – Walk on different surfaces (gravel, wood, tile) while recording
- Door sounds – Record your actual doors opening, closing, creaking
- Paper effects – Shuffle, crumple, or tear paper near the mic
- Clothing rustle – Move fabric near the mic for character movement sounds
- Keys and coins – Perfect for adding detail to scenes
Building a personal library of signature sounds is smart sound design practice. Once you’ve recorded a perfect phone ring or door creak, you can reuse it across multiple episodes. If you listen to the first two Tommy Law episodes, you’ll hear the same phone ring because it’s now part of Tommy’s audio world.
Field recording hack: Your smartphone can capture surprisingly good sound effects. When you hear an interesting sound in the world, record it. I’ve captured everything from coffee shop ambience to car engines using my iPhone.
The Four Pillars of Audio Drama Sound Design
Let’s break down the fundamental building blocks of effective sound design.
1. Ambience: Building Your Sonic Foundation
Ambience is the foundation of professional audio drama sound design. It’s the background layer that subtly tells listeners where they are without explicitly stating it.
Consider these location-specific ambiences:
- Busy city street – Layer traffic sounds, distant horns, footsteps, murmured conversations
- Office interior – Air conditioning hum, distant phones, keyboard typing, printer sounds
- Forest scene – Birds chirping, wind through trees, distant wildlife, leaves rustling
- 1940s detective office – Old building creaks, distant street sounds, desk fan, window draft
The key to ambience is subtlety. These sounds should sit quietly in the background, felt more than consciously noticed. Too loud and they’ll compete with dialogue. Too quiet and scenes feel sterile.
Ambience layering technique: Don’t use just one ambience track. Layer 2-4 different sounds at various volumes to create depth. For a city street, I might layer: general traffic (medium volume), distant sirens (very quiet), wind (quiet), and occasional car horn (punctuation).
2. Sound Effects: Telling the Story
Sound effects are the specific sounds that punctuate your audio drama and tell listeners what’s happening in each moment.
Good sound design uses SFX purposefully:
- Action sounds – Footsteps, door opens/closes, objects being picked up
- Character sounds – Phone rings, typewriter clicks, paper rustles
- Environmental sounds – Thunder, rain, wind, distant traffic
- Punctuation sounds – Dramatic moments like gunshots or glass breaking
The biggest sound design mistake? Using too many sound effects at full volume. Less is more. Select sounds that advance the story or establish crucial information. If a sound doesn’t serve the narrative, cut it.
3. Foley: Adding Life and Movement
Foley refers to sound effects created specifically for your production, usually synchronized to character movements.
In audio drama sound design, foley includes:
- Clothing rustles when characters move
- Footsteps that match dialogue pacing
- Hand movements (picking up objects, opening envelopes)
- Body movements (sitting down, standing up)
Foley is what makes your characters feel physically present in the world. Without it, dialogue feels like it’s floating in space.
Recording foley tips: Use a sensitive microphone and record in a quiet space. Perform actions slightly exaggerated since the mic is picking up less detail than human ears would in person. Record multiple takes so you have options when editing.
4. Music: Enhancing Emotion
Music in audio drama sound design serves several purposes:
- Theme songs – Establish your show’s identity and mood
- Scene transitions – Signal shifts in time or location
- Emotional underscoring – Enhance dramatic moments
- Pacing control – Build tension or provide breathing room
For Tommy Law, I composed my own theme music, but you can use royalty-free music from sites like Free Music Archive or create your own using AI tools like Suno.
Music mixing tip: Music should support the story, not compete with it. Keep music quieter than dialogue. Use EQ to carve out space in the mid frequencies where voices live. Consider high-pass filtering music to remove low frequencies that might muddy the mix.

Advanced Sound Design Techniques for Audio Drama
Once you’ve mastered the basics, these advanced techniques will elevate your sound design to the next level.
Reverb: Creating Believable Spaces
Reverb is one of the most important tools in audio drama sound design. It simulates how sound reflects off surfaces in different environments.
Every space has a unique reverb character:
- Small room – Short reverb time, intimate feel
- Large hall – Long reverb tail, spacious sound
- Bathroom – Bright, reflective reverb
- Outdoor space – Minimal reverb, sometimes slight early reflections
Critical reverb rule: All sounds in a scene must share similar reverb characteristics. If dialogue sounds like it’s in a cathedral but footsteps sound dry and close, listeners will notice the disconnect. Apply consistent reverb to place all sounds in the same acoustic environment.
I use convolution reverb plugins that model real spaces. TDR Proximity (free) and FabFilter Pro-R (paid) are excellent choices for podcast sound design.
EQ: Shaping Your Soundscape
Equalization (EQ) is essential for clean, professional sound design. Use EQ to:
- Remove muddiness – Cut low-mid frequencies (200-400 Hz) that cloud dialogue
- Add clarity – Boost presence frequencies (3-5 kHz) for intelligibility
- Create distance – Roll off high frequencies for sounds that should feel far away
- Make space – Carve different frequency ranges for different elements so they don’t compete
Sound design EQ workflow: Start by cutting problematic frequencies before boosting anything. Subtractive EQ often sounds more natural than additive EQ. High-pass filter (remove low frequencies) from sounds that don’t need bass to clean up your mix.
Compression: Controlling Dynamics
Compression reduces the dynamic range between loud and quiet parts of audio. In audio drama sound design, compression helps:
- Even out dialogue volume
- Make quiet sounds more audible
- Prevent sudden loud sounds from startling listeners
- Glue mix elements together
Don’t over-compress. Heavy compression makes audio sound flat and lifeless. Use gentle compression settings and trust your ears.
Panning: Creating Width
Panning places sounds in the stereo field, creating a sense of width and space in your audio drama.
Basic panning guidelines:
- Keep dialogue centered (or slightly left/right for multiple characters)
- Pan sound effects to match their implied location
- Use panning for movement (car driving past, person walking across a room)
- Keep low frequencies centered (bass information should be mono)
However, don’t go crazy with hard panning. Most audio drama sound design works best with subtle panning that suggests space without being distracting.

My Audio Drama Sound Design Workflow
Want to see how I actually apply these sound design techniques? Here’s my step-by-step workflow for creating a Tommy Law episode.
Step 1: Record Dialogue
I record most voice actors in my basement studio. Some actors record at home and send me files. I prioritize clean recordings with minimal background noise.
Step 2: Edit and Clean Dialogue
I import everything into Studio One and remove breaths, clicks, mistakes, and long pauses. I apply light EQ and compression to make voices sit nicely together.
Step 3: Build Ambience Foundation
This is where sound design really begins. I establish location with layered ambience tracks. For a 1940s office scene, I might layer:
- Old building ambience (creaks, subtle wind)
- Distant street sounds (period-appropriate traffic)
- Office atmosphere (paper rustles, distant typewriter)
- Room tone (subtle electrical hum)
These ambience layers run continuously throughout scenes at low volume.
Step 4: Add Sound Effects
Now I go scene by scene adding specific sound effects:
- Door opens/closes when characters enter/exit
- Footsteps synchronized to dialogue pacing
- Phone rings
- Object handling (papers, cups, keys)
- Environmental punctuation (thunder, sirens)
I pull most sounds from my personal Freesound library or record custom foley.
Step 5: Add Foley Details
This is the polish layer. Small movement sounds that make characters feel alive:
- Clothing rustles when someone shifts position
- Chair creaks
- Paper shuffling
- Subtle breath sounds
These foley elements are extremely subtle but essential for realistic audio drama sound design.
Step 6: Apply Reverb and Processing
I apply reverb to place all sounds in the same acoustic space. I use EQ to prevent frequency clashes. I add slight compression to dialogue for consistency.
Step 7: Mix and Balance
Finally, I adjust all levels so:
- Dialogue is clear and prominent (usually the loudest element)
- Ambience sits in the background (felt but not intrusive)
- Sound effects punctuate without overwhelming
- Music supports without competing
Step 8: Master for Podcast
I run the final mix through a limiter to reach -16 LUFS (podcast loudness standard). I do final quality checks on different playback systems (headphones, phone speakers, car audio).
Total sound design time for a 12-minute episode: approximately 8-12 hours.
Sounds like a lot, right? But here’s the thing: the more you practice sound design, the faster and more efficient you become. My first episode took forever because I was learning. Now I have systems, reusable sound libraries, and muscle memory for common tasks.
Common Audio Drama Sound Design Mistakes
Let me save you time by highlighting mistakes I made so you can avoid them.
Mistake #1: Using Too Many Sound Effects
Beginners often add EVERY possible sound at full volume. The result is cluttered and overwhelming.
Fix: Less is more in sound design. Start with essential sounds only. You can always add more layers, but removing them later is painful. If a sound doesn’t serve the story, cut it.
Mistake #2: Ignoring Room Tone and Ambience
Every space has a sound, even “silence.” Without consistent ambience, audio drama sound design feels sterile and artificial.
Fix: Always run an ambience layer, even if extremely subtle. It glues all other sounds together and makes your world feel real.
Mistake #3: Inconsistent Reverb
If dialogue sounds like it’s in a cathedral but footsteps sound bone-dry, listeners will notice something’s wrong even if they can’t articulate why.
Fix: Apply consistent reverb across all sounds in a scene. They should all exist in the same acoustic environment.
Mistake #4: Neglecting Perspective and Distance
If a character is across the room, their voice and footsteps should sound distant. If they’re right next to the listener, sounds should feel intimate and close.
Fix: Use volume, EQ (roll off highs for distance), and reverb to create spatial depth in your sound design.
Mistake #5: Not Checking on Multiple Playback Systems
Sound design that sounds perfect on studio monitors might be muddy on cheap earbuds.
Fix: Always check your mix on headphones, phone speakers, car stereo, and cheap earbuds. Make sure it translates well across all playback systems.
Mistake #6: Over-Processing
Too much reverb, compression, or EQ makes sound design feel artificial and fatiguing to listen to.
Fix: Process with restraint. If you’re not sure if an effect is helping, bypass it and compare. Sometimes less processing sounds better.
Learning Resources for Audio Drama Sound Design
Sound design is a skill you develop over time. Here are resources that helped me level up:
Online Courses and Tutorials
- Transom.org – Excellent in-depth articles on audio storytelling and sound design
- The Podcast Host – Comprehensive tutorials on audio drama production techniques
- YouTube channels – Curtis Judd, Booth Junkie, and Podcastage for equipment reviews and sound design techniques
- LinkedIn Learning – Professional audio post-production courses
Communities and Forums
- Reddit r/audiodrama – Active community sharing sound design tips, feedback, and advice
- Audio Drama Production Podcast – Behind-the-scenes discussions with professional audio drama sound designers
- Discord servers – Many audio drama communities have Discord servers where creators share techniques
Study Professional Productions
The best way to learn sound design is by critically listening to professional audio dramas:
- The Magnus Archives – Minimalist but effective sound design
- The White Vault – Immersive horror soundscapes
- Wolf 359 – Creative use of sound effects for sci-fi environments
- Welcome to Night Vale – Atmospheric and surreal sound design
- BBC Radio Dramas – Gold standard of audio drama production
- Sam Spade – Classic old time radio with excellent vintage sound design
Listen with headphones and pay attention to how sound designers layer ambience, time their effects, and use reverb to create space. Reverse-engineer their techniques.
And check out these detective podcasts to hear how different creators approach sound design in the mystery genre.
Frequently Asked Questions About Sound Design for Audio Dramas
What is sound design in audio drama?
Sound design is the process of creating, selecting, and layering audio elements to tell a story. In audio drama, sound design includes dialogue recording, sound effects, foley (custom movement sounds), ambience (background atmosphere), music, and audio processing like reverb and EQ. Good sound design makes listeners feel transported into your story’s world.
What equipment do I need to start sound design for audio dramas?
You need four essential items: (1) A decent microphone (Shure SM7B or Audio-Technica AT2020 for budget), (2) An audio interface (Focusrite Scarlett 2i2), (3) A Digital Audio Workstation or DAW (Audacity is free, Reaper costs $60), and (4) Closed-back headphones (Audio-Technica ATH-M50x). You can start with budget equipment and upgrade as your skills improve.
Where can I find free sound effects for audio drama?
The best free resource is Freesound.org, which has hundreds of thousands of Creative Commons-licensed sound effects. You can also search YouTube for “royalty free [sound effect name]” or record your own sounds using a microphone or smartphone. Building a personal library of sounds you can reuse across episodes is smart and efficient.
How long does sound design take for one audio drama episode?
For a 12-minute episode, expect 8-12 hours of sound design work. This includes editing dialogue, building ambience layers, adding sound effects, recording foley, applying reverb and EQ, mixing all elements, and mastering for podcast loudness standards. As you gain experience and build a library of reusable sounds, the process gets faster.
What is foley in audio drama sound design?
Foley is the art of creating custom sound effects that sync with character actions. In audio drama, foley includes clothing rustles when characters move, footsteps that match dialogue pacing, hand movements like picking up objects, and body movements like sitting or standing. Foley makes characters feel physically present in the world rather than voices floating in space.
What’s the difference between sound effects and ambience?
Sound effects are specific, punctuating sounds like footsteps, door slams, or phone rings that tell listeners what’s happening in each moment. Ambience is the continuous background soundscape that establishes location, like city traffic for a street scene or office hum for an interior. Ambience should be subtle and felt more than consciously noticed, while sound effects are more prominent.
Do I need expensive software for audio drama sound design?
No. Audacity is completely free and works great for beginners learning sound design. Reaper costs only $60 and is incredibly powerful. More expensive options like Adobe Audition ($20/month) or Logic Pro ($200) offer more features, but you don’t need them to create professional-quality audio drama. Focus on learning techniques before worrying about expensive software.
How do I make my audio drama sound professional?
Professional sound design requires five key elements: (1) Clean dialogue recordings with minimal background noise, (2) Layered ambience that establishes location, (3) Purposeful sound effects that advance the story, (4) Consistent reverb that places all sounds in the same acoustic space, and (5) Proper mixing where dialogue is prominent, ambience sits in the background, and sound effects punctuate without overwhelming. Practice and attention to detail matter more than expensive equipment.
Start Your Sound Design Journey Today
Here’s the truth I wish someone had told me when I started: your first attempts at sound design will probably sound amateurish.
That’s okay! Every professional sound designer started exactly where you are now, confused and overwhelmed, wondering if they were doing it right.
The only way to get better at audio drama sound design is to actually do it. Record some dialogue. Find sound effects on Freesound. Layer them together in your DAW. Listen back critically. Adjust. Try again.
With each project, you’ll improve. You’ll start hearing the world differently. Every door creak, every footstep, every ambient sound becomes a potential addition to your sound library. You’ll develop opinions about reverb. You’ll discover your personal sound design style.
When I listen to Episode 1 of Tommy Law now, I cringe at some early choices. But I’m also proud of it. Because I made it. I learned. I got better.
That’s what this journey is about: progress, not perfection.
So grab your microphone, download some sound effects, and start building your world. Whether you’re creating a noir detective drama, a sci-fi epic, a horror anthology, or something completely original, your story deserves great sound design.
With the techniques in this guide, listeners won’t just hear your audio drama. They’ll experience it. They’ll feel transported into your world. They’ll forget they’re listening to a podcast.
That’s the power of sound design.
Now get out there and create something amazing. Your audio drama awaits.
Ready to hear professional audio drama sound design in action? Listen to Tommy Law: Private Eye and pay close attention to the layered soundscapes, subtle foley work, and immersive ambiences that bring the 1940s noir world to life. Then apply these sound design techniques to your own audio drama.
About the Author: I’m Tom Tesnow, creator of Tommy Law: Private Eye. I’m a self-taught audio drama sound designer who learned by doing (and making plenty of mistakes). If you found this guide helpful, check out my other articles on old time radio detective shows and the best detective podcasts for more audio drama inspiration.